Installing shower plumbing might sound intimidating if you’ve never tackled it before, but it’s a project most confident DIYers can handle with the right tools and knowledge. Whether you’re replacing an old system, running plumbing in a new bathroom, or converting a half-bath into a full shower, understanding the basics of shower plumbing installation saves money and headaches. This guide walks you through the process from layout to testing, covering the supply lines, rough-in valves, and fittings that make your shower actually work.
Table of Contents
ToggleKey Takeaways
- How to install shower plumbing requires careful planning of your rough-in valve location (12–16 inches above the pan) and supply line routes before cutting into walls.
- Choose between copper tubing with soldering or PEX tubing with crimping; PEX is faster and requires no permits, making it popular for DIY projects.
- Install individual shutoff valves on hot and cold supply lines before the rough-in valve, allowing you to isolate the shower for repairs without draining the entire house.
- Always pressure-test all connections for 5–10 minutes before closing the wall, catching small leaks that could become costly water damage behind drywall.
- Verify local building codes for anti-scald valves, water line spacing near electrical wiring, and permit requirements—pulling a permit costs far less than fixing hidden leaks.
Understanding Your Shower Plumbing Layout
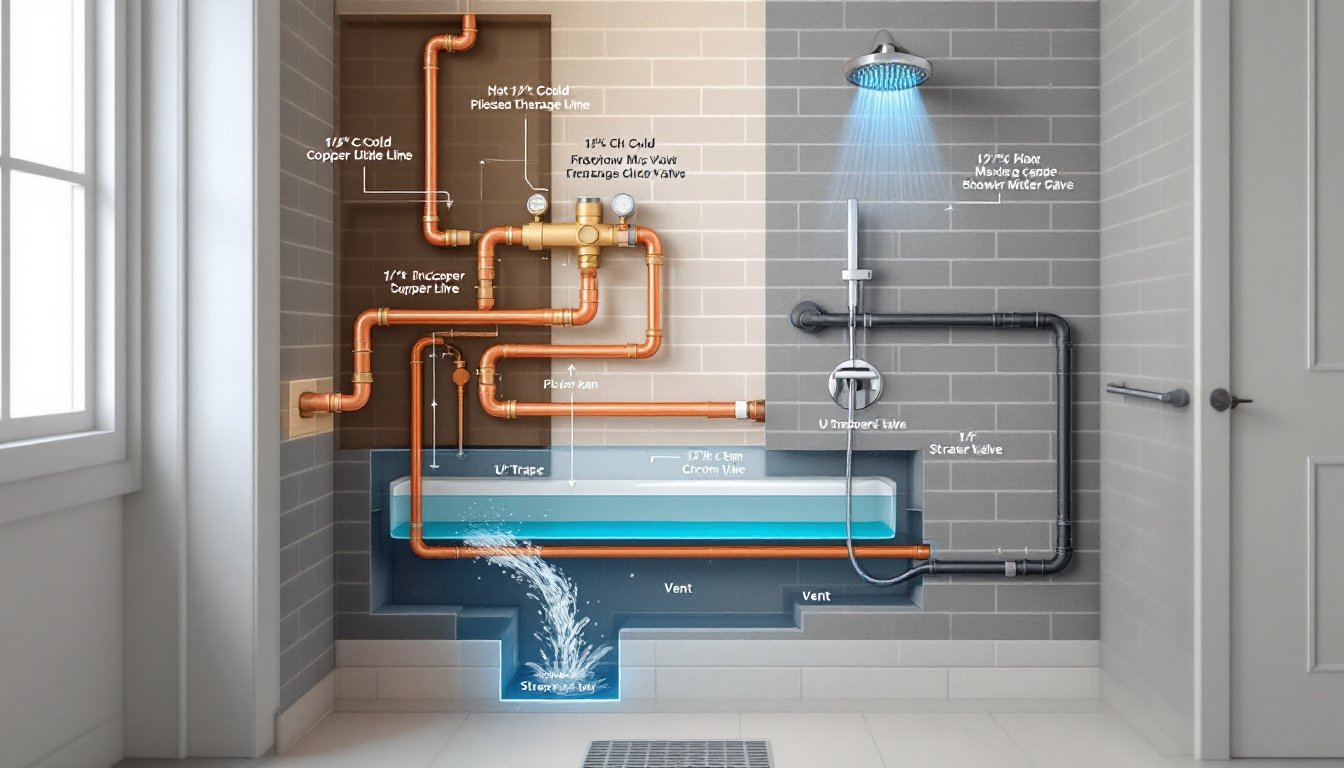
Before you cut into walls or buy a single fitting, you need to understand the anatomy of shower plumbing. Shower systems require two main components: supply lines that deliver hot and cold water, and a rough-in valve (also called a shower valve or trim valve body) that mixes the water and controls flow.
Most residential showers use either a two-valve system (separate hot and cold controls) or a single-valve system (one handle mixing both). Single-valve systems are more common in modern installations and require less wall penetration. The rough-in valve sits behind the wall and connects to your home’s main water lines, typically ½-inch copper or PEX tubing for supply lines.
Water must flow in at adequate pressure: roughly 40-60 PSI (pounds per square inch) is standard. If your home’s water pressure runs lower, you may need a pressure-boosting pump, which isn’t a DIY fix. Also note that codes vary by jurisdiction, some require anti-scald valves to prevent burns, especially in homes with children or elderly residents. Check your local building codes before starting.
The shower arm (the pipe extending from the wall where the showerhead attaches) typically uses ½-inch galvanized steel, copper, or PEX. The supply lines behind the walls and the rough-in valve must be accessible for maintenance, which means they’re installed before drywall goes up.
Gathering Tools and Materials You’ll Need
You won’t need a contractor’s van full of equipment, but having the right tools on hand prevents frustration and rework.
Essential Tools:
- Tubing cutter or hacksaw for cutting supply lines
- Adjustable wrench and pipe wrench (two of each helps)
- Torpedo level for checking wall studs and fitting placement
- Drywall saw or oscillating multi-tool for opening access holes
- PEX crimper or cinch tool (if using PEX tubing)
- Soldering equipment and solder (if running copper)
- Pencil and measuring tape
- Teflon tape for threaded connections
Materials:
- Supply tubing: ½-inch copper (L or K grade) or PEX tubing with appropriate fittings
- Rough-in valve: A quality pressure-balancing or thermostatic valve rated for your water pressure
- Shutoff valves: Individual stops for the hot and cold supply lines
- Elbows, couplings, and adapters: Sized to match your tubing
- Solder and flux (for copper) or PEX crimp rings/cinch clamps
- Showerhead arm: ½-inch galvanized, copper, or PEX with an escutcheon (the flange that hides the hole)
- Drywall and fasteners for patching access holes
Budget roughly $200–$400 for materials, depending on valve quality and tubing choice. Pressure-balancing valves cost more upfront but prevent sudden temperature swings if someone flushes a toilet elsewhere in the home.
Preparing Your Walls and Finding the Right Location
Location matters more than most DIYers realize. Your rough-in valve should sit behind a wall stud between 12 and 16 inches above the shower pan or tub rim. This height works with standard showerhead placement (typically 78–80 inches above the floor) and keeps the valve accessible if repairs are needed.
Locate the studs on your wall using a stud finder, you’ll want to run your supply lines vertically along the stud cavity to keep them protected and neat. Mark the center point where your rough-in valve will sit. If you’re running new supply lines, plan the route from your main water lines: the simpler the path, the fewer leak points you have.
Once you’ve marked the rough-in location, cut an access opening in the drywall slightly larger than your valve body (typically 4–6 inches wide). Use a drywall saw or oscillating tool fitted with a drywall blade. Remove any insulation blocking the stud cavity, you need clear access to drill or cut.
Check building codes for your area about water line placement near electrical wiring. The National Electrical Code (NEC) requires proper spacing. If unsure, consult a local inspector or electrician. Securing new supply lines to studs with pipe clamps every 3 feet prevents vibration noise and keeps everything stable.
Installing Supply Lines and Shutoff Valves
With your access hole prepped, begin running supply lines from your main water shutoff (or the branch lines serving that bathroom).
If using copper tubing:
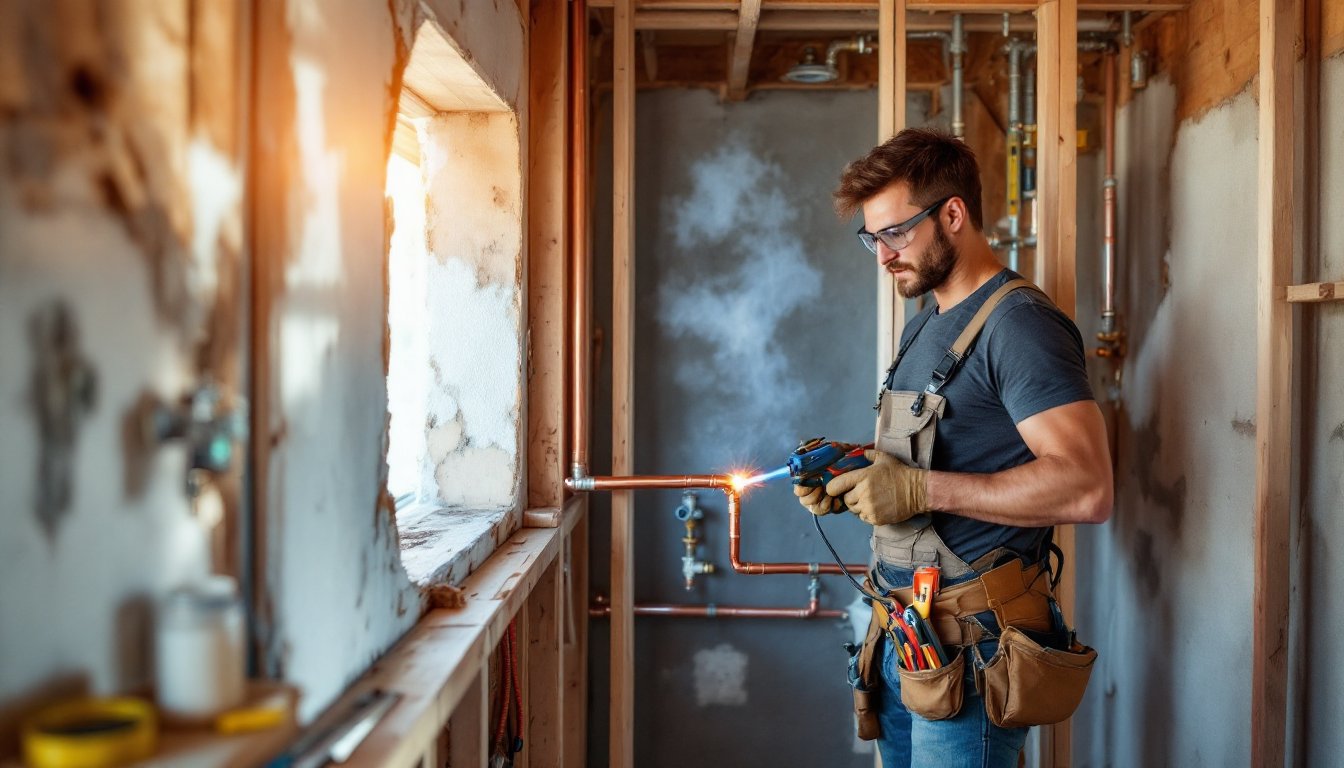
Measure and cut your ½-inch tubing to length using a tubing cutter, it leaves a cleaner edge than a hacksaw. Deburr the inside edges with the reaming tool on the cutter. Soldering is the traditional method: apply flux to the fitting and tube ends, heat with a propane torch until the joint glows faintly, then feed solder into the joint. It bonds instantly. Wear heat-resistant gloves and clear the area of flammable materials. Copper runs will be rigid, ensure they’re supported every 3–4 feet.
If using PEX tubing:
Measure and cut with a tubing cutter (scissors don’t work well). PEX is flexible, so you can route it without many fittings. Crimp rings and a crimp tool are faster than soldering and require no flame risk. Slide the ring onto the tubing, insert the fitting barb, position the ring ¼ inch from the end of the fitting, and squeeze the crimp tool until the ring closes around the tubing. PEX doesn’t require soldering permits in most jurisdictions, another reason it’s popular for DIY work.
Install shutoff valves on both the hot and cold supply lines before the rough-in valve. These let you isolate the shower for future repairs without draining the entire house. Ball valves are reliable and inexpensive. Wrap the male threads (pipe end) with Teflon tape clockwise 3–4 times before screwing into a female fitting, this prevents leaks at threaded joints.
Run your hot and cold lines parallel, keeping them at least 6 inches apart to prevent heat transfer and maintain code compliance. Support lines every 3 feet with plastic or metal pipe clamps.
Mounting the Rough-In Valve and Fittings
The rough-in valve is the heart of your shower plumbing. It accepts supply lines and routes mixed water to the shower arm. Most residential rough-in valves come as cartridge or ball-type mixers.
Position the valve so the inlet ports (where supply lines connect) face toward your running lines. The outlet faces toward where your shower arm will emerge. Use a mounting bracket or secure the valve body to the wooden blocking between studs using stainless steel fasteners, never rely on solder or crimp joints alone to hold the valve weight. The valve body must be rock solid: movement causes joint failures over time.
Connect your hot and cold shutoff valves to the rough-in valve inlets using your soldered or crimped fittings. Double-check that hot connects to the hot inlet and cold to cold. A marking on the valve body usually indicates this. Tighten connections firmly but don’t over-tighten, this can crack fittings.
For the shower arm (the pipe that pokes through the wall where the showerhead mounts), run it through a drilled hole in the stud if possible, or use a fitting behind the valve. The arm should extend roughly ¾ inch past the finished wall surface so the showerhead escutcheon (flange) fits snugly against the tile or paint. Solder or crimp the arm securely to the outlet of the rough-in valve. Check that it’s level using a torpedo level, a tilted arm looks unfinished and can cause the showerhead to drip or spray unevenly.
Cap off any unused ports on the rough-in valve with brass end caps or plugs.
Testing for Leaks and Finalizing Your Installation
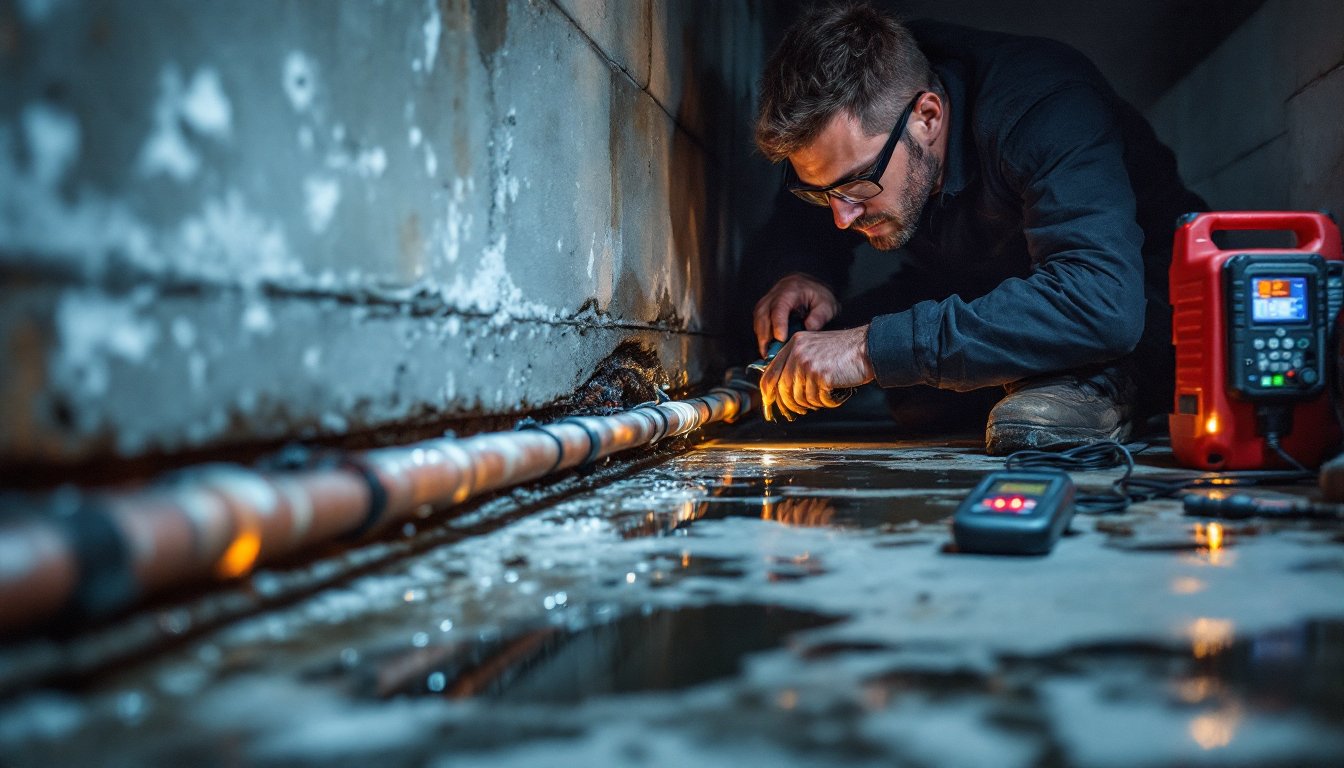
Before you close the wall, pressure-test everything. Turn on the main water shutoff and slowly open your hot and cold shutoff valves. Watch every connection, joints, valve bodies, crimp rings, for even tiny drips. A slow weep today becomes a major leak behind the wall tomorrow.
Run water through the rough-in for 5–10 minutes. Listen for any hissing or dripping sounds. Check joints with a dry rag: any moisture indicates a leak needing immediate attention. If a soldered joint fails, you’ll need to drain the line, drain-clean the fitting, and re-solder. If a crimp joint fails, cut out the ring with a pair of side cutters and recrimp with a fresh ring.
Once you’re confident there are no leaks, cap the shower arm opening with a plastic test cap (removes later when you install the trim plate and showerhead). This keeps drywall dust and debris from clogging the outlet during construction.
Install a wooden backing block or piece of 2×4 blocking at the rough-in valve location if you haven’t already, this anchors the valve and gives you something solid to screw the trim ring to later. The backing board should extend at least 12 inches in either direction and be securely nailed to the studs.
Now patch your access hole with drywall, tape, and spackle. Once painted, the area is invisible. The rough-in plumbing is complete and ready for tile, enclosure framing, or whatever finish you’re planning. The actual showerhead, valve trim plate, and spout install after the wall is finished and aren’t covered in this guide, those come during the trim-out phase.
Conclusion
Installing shower plumbing as a DIY project is realistic if you approach it methodically: understand the layout, prep your walls carefully, run supply lines methodically, and pressure-test before closing walls. The biggest mistakes come from rushing prep work or ignoring code requirements. When in doubt, pull a permit and have a local inspector review your work, it costs far less than fixing a hidden leak years later. With patience and attention to detail, you’ll have a solid, leak-free shower plumbing system ready for years of reliable use.