Exposed plumbing showers have moved beyond warehouse lofts and into mainstream bathrooms, and for good reason. Instead of hiding pipes behind walls, this design approach celebrates them as functional art. The trend blends aesthetic appeal with practical construction, giving homeowners a way to create a striking focal point without major structural work. Whether you’re drawn to industrial minimalism or modern farmhouse vibes, an exposed plumbing shower can deliver both style and substance. This guide covers everything you need to know to evaluate, design, and install one yourself.
Table of Contents
ToggleKey Takeaways
- Exposed plumbing showers reduce construction costs by eliminating wall framing, drywall, and rough-in labor while creating a deliberate design focal point.
- Proper drainage slope (¼ inch per foot), adequate backing support, and local code compliance are essential before installing an exposed plumbing shower.
- Material selection—such as polished copper, stainless steel, or matte black finishes—defines whether an exposed plumbing shower reads as refined, industrial, or farmhouse.
- Water access location, thermal expansion protection, and wall space planning are critical design considerations to evaluate before cutting into walls.
- DIY installation of supply and drain lines is achievable with soldering skills and the right tools, though licensed plumbers should handle permits and complex venting requirements.
- Test all connections thoroughly for leaks and ensure escutcheons and quality fittings hide gaps and anchor points for a polished, intentional appearance.
What Are Exposed Plumbing Showers?
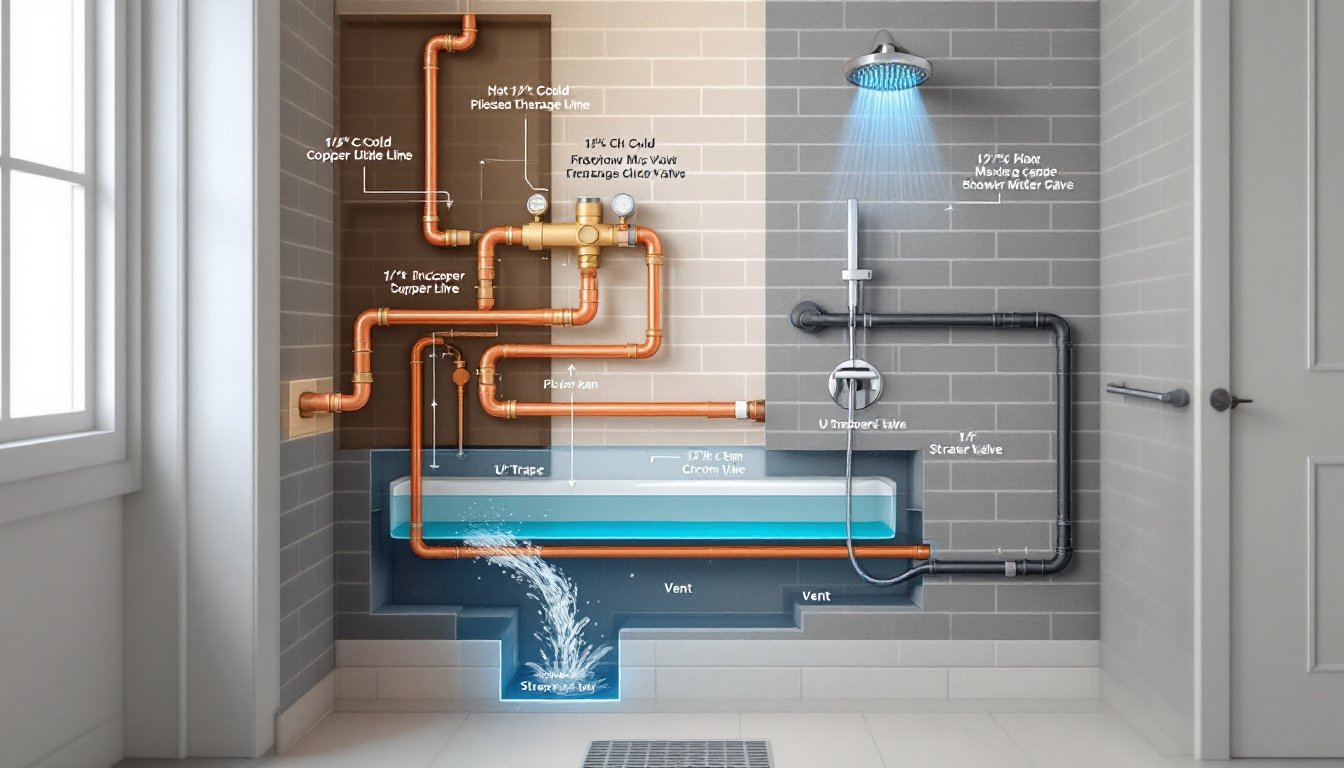
An exposed plumbing shower is exactly what it sounds: the supply and drain lines run visibly on the wall, rather than concealed inside the wall cavity. Typically, you’ll see the copper, PEX, or steel pipes running from floor to showerhead, along with the P-trap and drain lines. The showerhead itself may mount directly onto a standpipe or a wall-mounted elbow fitting. This is fundamentally different from conventional in-wall plumbing, which requires studs, framing, and drywall to hide the pipes.
The aesthetic hinges on clean lines, quality finishes, and thoughtful spacing. A polished chrome showerhead paired with matching supply lines looks intentional and upscale. The same setup in rough black iron reads industrial and edgy. The key difference between exposed plumbing and a plumbing mistake is deliberate design and proper materials that can withstand bathroom humidity and thermal expansion.
Why Homeowners Are Choosing Exposed Plumbing
Budget-Friendly Appeal
Skipping in-wall framing and drywall cuts material and labor costs significantly. You won’t need to open up studs, install rough-in piping behind the wall, or patch and finish drywall. For older homes or those with plaster walls, avoiding wall surgery is especially appealing. If you’re adding a new shower to a space that didn’t have one, exposed plumbing sidesteps the expense of chasing pipes through walls and calling in licensed plumbers for a full in-wall rough-in.
That said, exposed plumbing isn’t a free pass. Finish materials (solid brass, polished stainless, powder-coated steel) cost more than basic PVC or galvanized pipe hidden inside the wall. The trade-off is that you’re paying for aesthetics, not structural complexity.
Design Versatility
Exposed lines work with nearly every design language. Industrial spaces lean into raw finishes and heavy iron fittings. Minimalist bathrooms appreciate the geometric clarity of clean copper or chrome lines. Coastal and farmhouse styles pair nicely with matte black or weathered brass. The vertical emphasis of supply lines also draws the eye upward, making smaller bathrooms feel taller.
You can play with spacing and alignment too. Centered, symmetrical lines feel formal and refined. Offset or asymmetrical arrangements add visual interest and a custom, artisanal touch.
Essential Design Considerations Before Installation
Before cutting into anything, walk through these critical questions.
Water access and main lines. Is cold and hot water easily available near the shower location? If your main water supply is on the opposite side of the house, running exposed lines across the bathroom or exterior wall becomes a planning headache. Check where the water heater sits relative to your shower, long runs between them mean slower hot water delivery and heat loss.
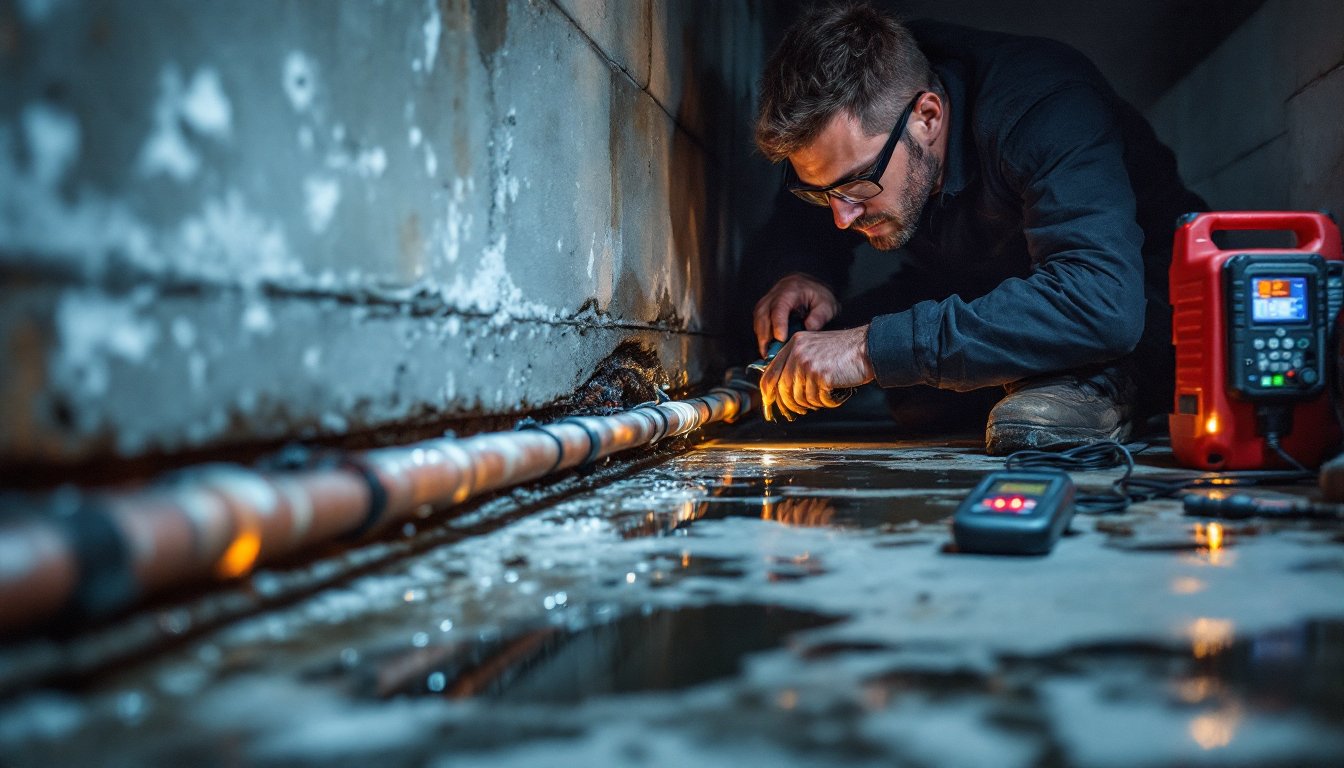
Drainage and venting. Exposed drains need proper slope and vent lines. The trap arm (the pipe between the drain and the P-trap) must slope ¼ inch per foot toward the trap itself. If your shower location doesn’t allow for adequate vent stack positioning, you may need a wet vent or air admittance valve, items that get harder to hide with exposed plumbing. Some jurisdictions have restrictions on air admittance valves, so check local codes before planning.
Thermal expansion and freeze protection. Metal pipes expand and contract with temperature changes. In winter, uninsulated lines in an unheated bathroom or exterior wall can freeze. Copper is particularly prone to burst if ice forms inside. Consider pipe location, climate, and whether the space is heated year-round. Insulation and heat trace cable are options but add visual clutter.
Wall material and support. Exposed pipes are heavy, especially when full of water. Drywall alone won’t hold them securely. You’ll need backing board, blocking, or studs to anchor brackets and supports. Tile, brick, or plaster walls may require careful drilling and heavy-duty anchors.
Wall space limitations. Measure twice and think in three dimensions. A supply elbow, showerhead bracket, and soap dish all need room to coexist without looking crowded. Account for towel bars and fixtures too.
Materials and Finishes That Matter
Pipe materials. Copper is the traditional choice, it’s durable, looks refined when polished, and develops a beautiful patina over time. PEX (cross-linked polyethylene) is budget-friendly and flexible, but bare PEX isn’t attractive exposed. Chrome-plated brass fittings can hide PEX connections while delivering a clean look. Stainless steel and powder-coated steel are increasingly popular for industrial aesthetics. Avoid galvanized steel in wet areas: the zinc coating can corrode and discolor over time.
Fittings and elbows. Solid brass fittings outlast plated ones in humid bathrooms. Look for quarter-turn elbows and tees that reduce visible joints. Compression fittings (as opposed to soldered or threaded) are easier for DIYers but create more visible hardware at connection points. Choose finishes (brushed nickel, oil-rubbed bronze, polished chrome, matte black) that match your overall bathroom style.
Showerhead and trim. The showerhead is the star. Fixed head models are simpler to install: handheld heads add versatility but require a taller standpipe and a hose run that’s visible. Trim rings and escutcheons (the decorative plates where pipes meet the wall) hide anchor points and gaps. Coordinate these finishes with supply line materials for a cohesive look.
Sealant and waterproofing. Use silicone caulk rated for kitchens and baths around pipe penetrations. Avoid gaps where water can seep behind the wall. If pipes pass through exterior walls, consider spray foam or low-expansion foam sealant to prevent air infiltration.
Step-By-Step Installation Guide for DIY Enthusiasts
Before you start, shut off water to the bathroom and open a faucet downstream to release pressure. Plug or cap existing drain and supply lines to prevent debris and water spills.
1. Locate and prepare the wall. Mark the location of cold and hot supply lines, the drain, and the showerhead position. Use a stud finder to identify framing. If there’s no stud backing where you need it, install blocking (a horizontal 2×6 or 2×8 between studs) at the appropriate height. Drill holes for supply line pass-throughs: use a hole saw slightly larger than the pipe diameter.
2. Install the drain assembly. Install the shower base and P-trap first, before running exposed supply lines. Ensure the trap is positioned so drain lines slope toward it. A sloped drain arm (¼ inch per foot) is critical for proper drainage and odor control. Secure the trap with appropriate hangers.
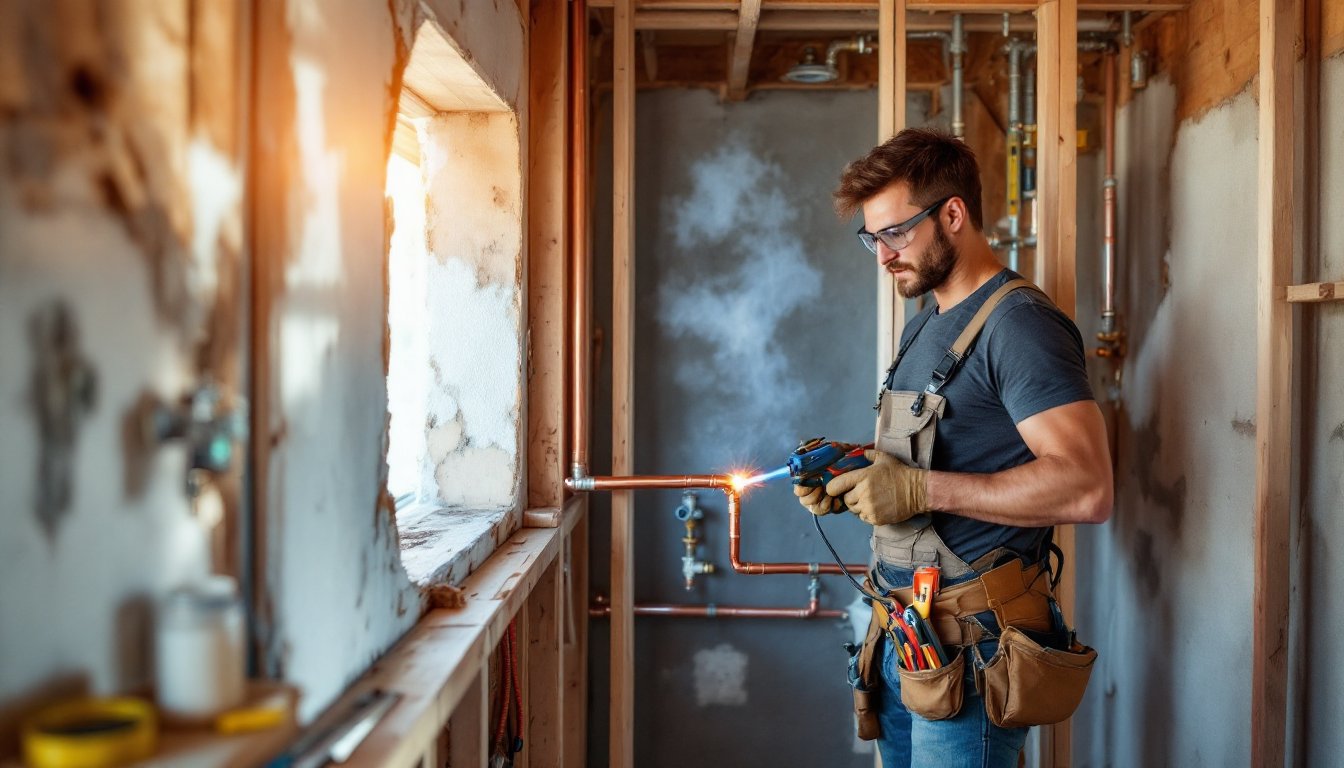
3. Run hot and cold supply lines. Cut and fit copper or PEX to length. If soldering copper, use lead-free solder and flux rated for potable water. For PEX, use push fittings or crimp rings depending on your system. Run both lines vertically and parallel, spaced evenly for visual balance. Anchor them every 32 inches with pipe straps or clips bolted to the backing board or studs.
4. Install the mixing valve. A DIY shower installation guide mounted on the wall where hot and cold lines converge. Secure it to backing board and ensure it’s level. Solder or connect supply lines to the valve inlets.
5. Connect the showerhead riser. From the valve outlet, run a single supply line (usually ½-inch copper or ¾-inch PEX) upward to the showerhead height. Install an elbow and standpipe or mounting bracket. Use an escutcheon ring to hide the wall penetration. Professional shower pan installation, and the same principles apply to exposed systems.
6. Install the showerhead. Thread the showerhead onto the standpipe or bracket arm. Wrap threads with plumber’s tape to ensure a tight, leak-free fit.
7. Test for leaks. Turn water back on slowly. Check all connections and joints. Let water run for several minutes and look underneath and behind the wall for drips. Tighten fittings or re-solder as needed.
Tools you’ll need: adjustable wrench, pipe wrench, tube cutter, soldering torch (if using copper), drill with hole saw, stud finder, level, measuring tape, strap wrench for tight angles. Safety: Wear work gloves when soldering or handling sharp pipe edges. If soldering, use eye protection and ensure good ventilation: solder fumes are hazardous in confined spaces.
Pro tip: Practice bending PEX or dry-fitting copper before committing to final placement. Mistakes are expensive and time-consuming to fix once walls close.
Important: Exposed plumbing showers that alter the water supply, drainage, or vent stack typically require a permit and inspection in most jurisdictions. Check with your local building department before starting. If you’re uncomfortable soldering or running drain vents, call a licensed plumber for rough-in work: you can install trim and finishes yourself. Complete shower installation guidance walks through all steps, and consulting it alongside this guide ensures compliance with your regional code. Also, understanding potential plumbing risks is important, home plumbing insurance can protect you if something goes wrong after installation.
Wrapping Up Your Exposed Plumbing Shower
Exposed plumbing showers deliver style and savings when planned and executed thoughtfully. The payoff is a bathroom that feels intentional, open, and distinctly yours. Take time to understand your home’s plumbing layout, code requirements, and material choices before diving in. If any step, soldering, venting, or drain work, feels beyond your skill level, bring in a pro for that portion. The rest is craftsmanship you can absolutely handle with the right tools and attention to detail.