Exposed shower plumbing has shifted from a contractor’s eyesore to a deliberate design choice that homeowners actively seek out. Once hidden behind walls and finished surfaces, pipes now take center stage in bathrooms, visible, purposeful, and often striking. This trend reflects a larger design movement toward authenticity and industrial aesthetics, where the mechanics of your home become part of its character. Whether you’re drawn to the minimalist appeal or the raw industrial look, exposed plumbing offers genuine benefits beyond appearance: easier maintenance, simpler installation, and tangible cost savings. But like any design trend with staying power, it comes with real considerations that deserve your attention before you commit.
Table of Contents
ToggleKey Takeaways
- Exposed shower plumbing has become a deliberate design trend that combines industrial and minimalist aesthetics with practical benefits like easier maintenance, faster repairs, and lower installation costs.
- Proper planning and intentional execution are essential—exposed plumbing only looks polished when every joint, fitting, and pipe run is carefully aligned and matched in finish and material.
- Maintenance discipline is required to prevent mineral deposits, discoloration, and buildup on visible pipes, especially in hard-water regions; monthly wiping with a damp cloth keeps the installation looking intentional rather than neglected.
- Material costs for exposed shower plumbing typically range from $300–$600, and while installation is simpler than in-wall systems, the mixing valve setup and pressure-balance requirements often warrant hiring a licensed plumber for code compliance.
- Freezing risk in cold climates and thermal expansion noise are manageable with proper insulation and heat tape, but must be addressed during planning to prevent costly pipe damage.
- Exposed shower plumbing requires building permits and inspector approval, as code scrutiny is stricter for visible systems—confirm local requirements before installation to avoid compliance issues.
What Is Exposed Shower Plumbing?
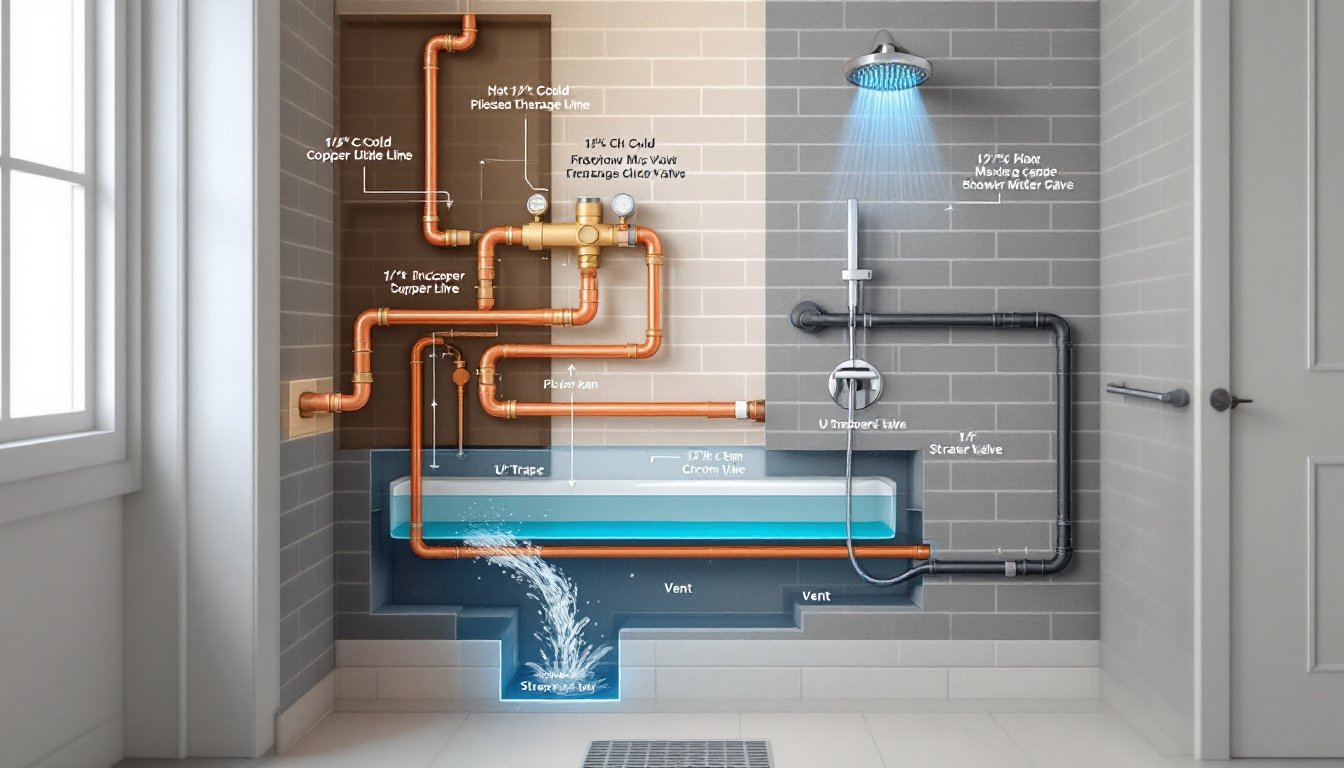
Exposed shower plumbing means the supply lines, drainage pipes, and fixtures visible to anyone using or viewing the shower, nothing concealed in walls or behind cabinetry. You’ll see the full run of pipe from the shutoff valve through the mixing valve, up the riser to the showerhead, and down to the drain. These pipes are typically copper, PEX (cross-linked polyethylene), or black steel, materials chosen for durability and aesthetic appeal as much as function.
The setup requires careful planning because every joint and seam becomes part of the visual story. Chromatic finishes (polished chrome, matte black, brass) dominate exposed installations because they’re attractive and protect the material underneath. Unlike hidden plumbing that can tolerate a few leaks for a while, exposed systems make water damage immediately obvious, which forces discipline during both installation and maintenance. Most codes permit exposed plumbing in bathrooms, though your local jurisdiction may have specific requirements about supports, clearances, and materials, always check before planning.
Design Trends Making Exposed Pipes Popular
Industrial and Modern Aesthetics
The industrial style, raw, functional, unadorned, naturally embraces exposed plumbing as part of the visual language. Black matte pipes, visible joints, and straightforward routing appeal to homeowners who want their bathrooms to look honest, not decorated. Paired with concrete, steel fixtures, and minimal trim, exposed plumbing signals intentionality. It’s not hidden because it’s beautiful: it’s exposed because hiding it would strip away the design’s authentic character. This movement gained real momentum around 2020 and shows no signs of slowing in 2026.
Minimalist and Contemporary Styles
Minimalism paired with exposed plumbing creates a different mood, cleaner, more architectural. Polished chrome or brushed nickel pipes become sculptural elements that organize the visual plane above the shower. In minimalist baths with white walls, floating vanities, and limited decoration, the plumbing becomes intentional geometry rather than something to apologize for. The trend works because it solves a design problem: what do you do with the structural reality of pipes? Expose them thoughtfully, and they become an asset rather than a liability.
Both trends share one truth: exposed plumbing only works when it’s done with intention. Rough, haphazard runs or mismatched materials read as careless, not cool.
Benefits of Exposed Shower Plumbing
Easier access for maintenance and repairs is the practical heavyweight benefit. If you need to adjust a mixing valve, replace a fitting, or troubleshoot a leak, you don’t excavate drywall, you reach out and do the work. This accessibility translates directly into lower repair costs over time and faster problem-solving when something goes wrong.
Simplified installation cuts labor and material costs upfront. No framing, no drywall boxing, no finishing, the pipes are simply routed, supported, and tested. For DIYers or budget-conscious renovators, this means a project that stays within timeline and budget more reliably than in-wall plumbing.
Visual flexibility and customization matter more than people expect. Want to adjust the showerhead height? Swap a component? Change the finish? Exposed systems let you adapt without calling a contractor. You can also mix and match finishes, satin nickel riser, matte black mixing valve, polished chrome showerhead, in ways that feel intentional rather than mismatched.
Cost savings accumulate across material, labor, and long-term maintenance. No structural modifications, no plaster repair, no premium finishes to conceal imperfections. Material costs run lower than concealed systems when you’re using durable, attractive pipe and fittings that don’t require redundant framing or boxing.
Challenges and Maintenance Considerations
Mineral deposits and discoloration happen faster on exposed pipes than hidden ones, especially in hard-water regions. Chromatic finishes mask staining better than bare copper, but nothing stops buildup altogether. Regular wiping with a damp cloth prevents ugly white or green marks: mineral-deposit cleaners handle stubborn cases. Budget time monthly for this maintenance, it’s not onerous, but it’s not optional if you want your plumbing to look intentional rather than neglected.
Temperature fluctuations affect exposed copper and steel more visibly than concealed pipes. Pipes contract and expand slightly with hot and cold water, sometimes creating audible pinging sounds. This is harmless but annoying: insulation helps, though it reduces the visual impact of exposure. Expect minor thermal noise in early morning or late evening when usage changes abruptly.
Freezing risk in unheated spaces (basements, uninsulated exterior walls) requires heat tape or insulation on exposed pipes. If your bathroom is in a cold climate or near an exterior wall, account for this. Frozen pipes rupture, an expensive disaster, so prevention is not optional.
Aesthetic discipline demands that every fitting, valve, and seam align intentionally. Crooked runs, mismatched materials, or hastily soldered joints announce themselves immediately. The design only works if execution is clean and purposeful: there’s no hiding mediocre work.
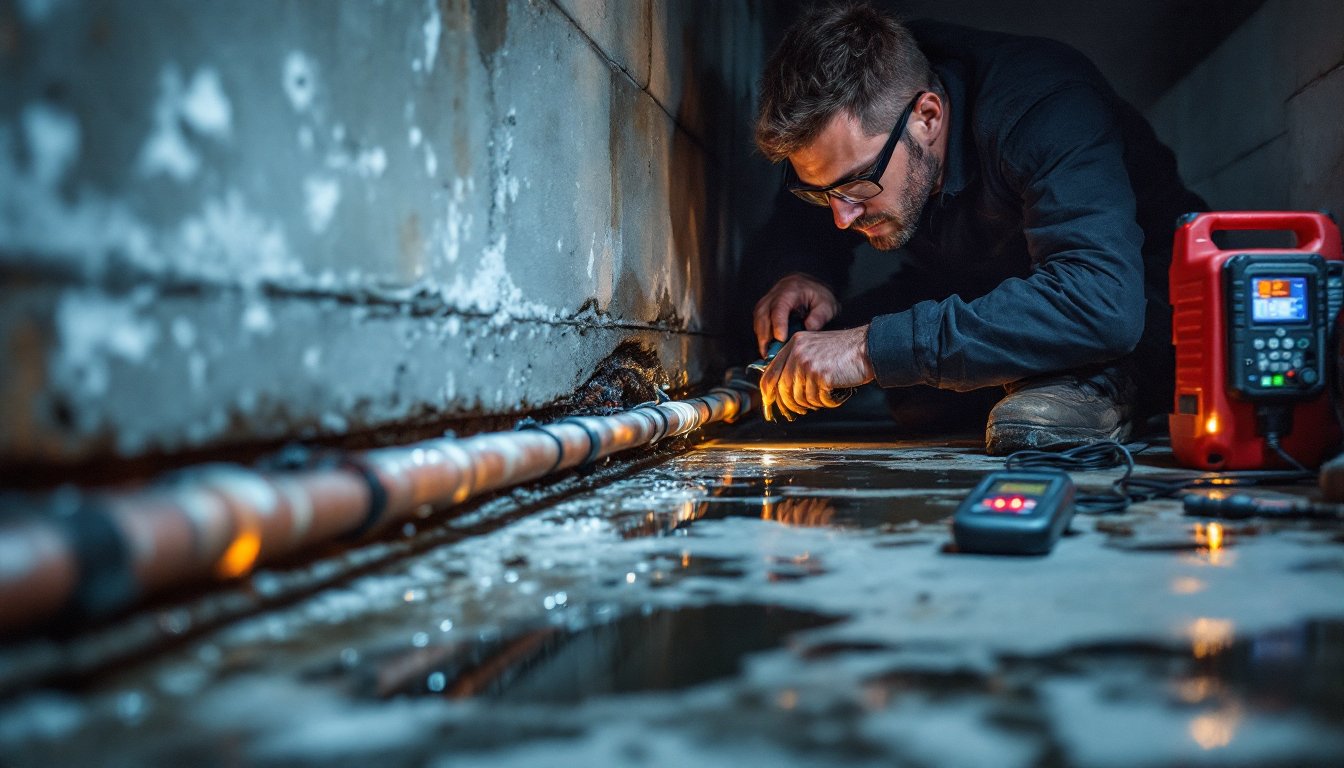
Code and inspector scrutiny applies more closely to visible systems because inspectors see everything. Rough installation that passes muster in a wall gets flagged when it’s exposed. Hire a licensed plumber or work with your local inspector during DIY installation to confirm compliance.
How to Install Exposed Shower Plumbing
Plan and route your system before cutting or fitting. Sketch the path from supply lines through the mixing valve, up the riser, and to the showerhead. Note every support bracket, fitting, and connection point. Mark stud locations and anchor points on the wall, you’ll need sturdy framing to hang pipes. Most codes require support brackets every 32 inches on horizontal runs and at direction changes.
Gather materials: 1/2-inch copper or PEX supply lines, a thermostatic or valve-based mixing valve, elbows and tees (solder-type, push-fit, or compression depending on your chosen method), support clamps rated for your pipe diameter, and your showerhead assembly. Chromatic finishes on visible fittings cost more upfront but prevent the dull patina that bare copper develops. For a basic shower setup, expect material costs between $300–$600 depending on fixture quality and finish.
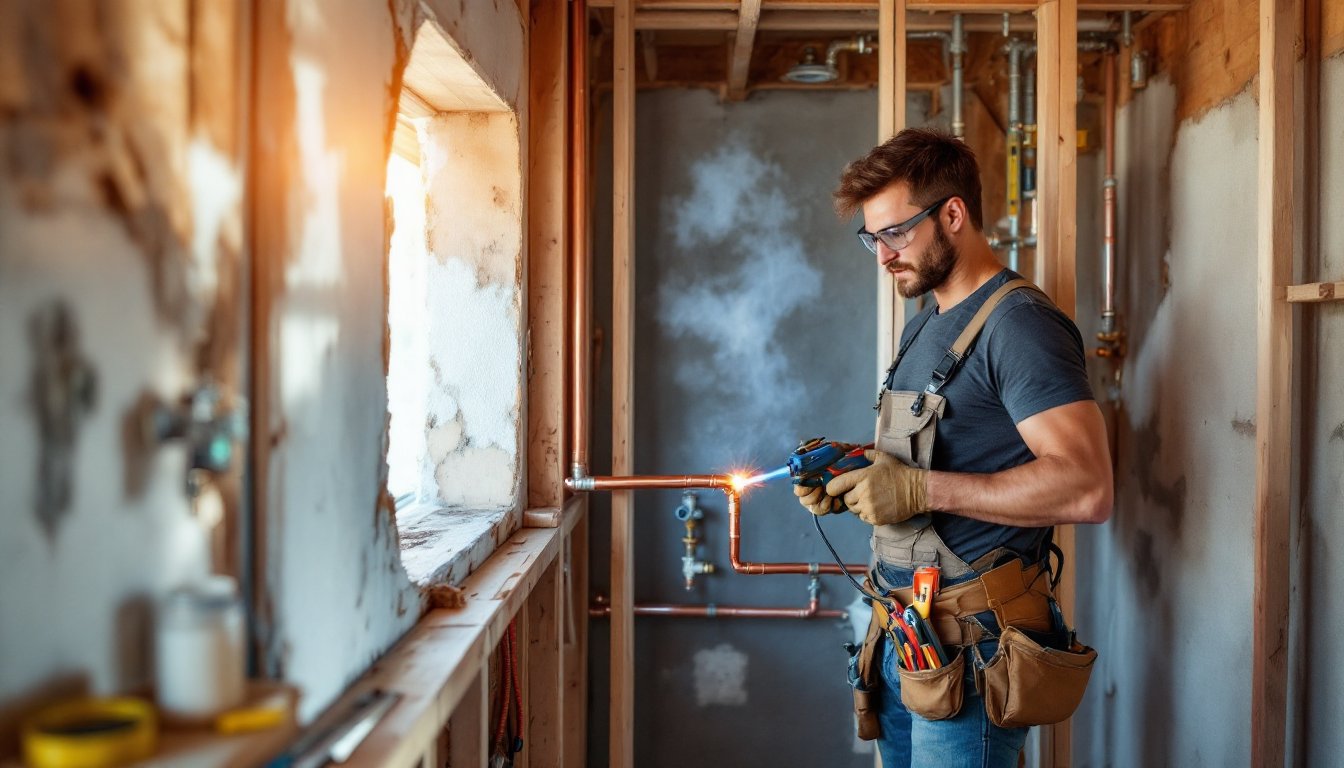
Install the mixing valve first, securing it solidly to the wall framing. This valve is the control point, it balances hot and cold water and prevents scalding. If you’re not experienced soldering copper, push-fit or compression fittings work fine for exposed runs: the visual difference is minimal when you’re using matched fittings and finishes.
Run supply lines upward from the mixing valve to a point above the showerhead, then route to the showerhead outlet. Support every 32 inches with adjustable brackets to allow for slight movement and thermal expansion. Solder or secure all connections carefully, leaks are immediately obvious and will damage walls and subfloors below.
Install the drain separately, routing it downward from the showerhead to the drain pan or floor. Pitch should be 1/4 inch per foot to ensure water runs downhill and doesn’t pool. This may seem like overkill, but standing water in exposed pipes invites mineral deposits and bacteria growth.
Test the system under full pressure before finishing walls or tiles. Run hot and cold water, check for leaks at every joint, and confirm the mixing valve responds smoothly. This step saves you from discovering problems after you’ve closed walls or sealed the installation.
Whether to DIY or hire: If you’re comfortable soldering copper and reading plumbing codes, exposed plumbing is one of the simpler DIY tasks. But, the mixing valve installation and pressure-balance requirements may warrant a licensed plumber’s involvement, especially if your local code is strict. Most homeowners benefit from professional guidance during the valve setup to ensure proper temperature and pressure control. If budget allows, a hybrid approach, hiring the plumber for the valve and pressure test, doing the cosmetic routing yourself, splits the cost.
Always pull any required permits before starting. Exposed plumbing doesn’t hide shortcuts, and an inspector will catch them immediately. Building departments in many areas mandate a licensed plumber for water supply work, so confirm your local rules. Your contractor or local authority can clarify requirements specific to your jurisdiction.
Finish touches: Once the system is tested and approved, touch up any solder drips or rough fittings with emery cloth and chromatic polish. Caulk or seal where pipes penetrate walls, using a flexible, water-resistant sealant. Your system is now ready for tile, grout, and waterproofing, but the plumbing work is the foundation that makes everything else possible.